New South Wales > Northern Beaches
Warriewood
| Type | Coastal Cliff |
| Conditions | North East. Does not tolerate too much deviation from straight on at launch before flying characteristics change. |
| Height | 130' / 40m |
| Rating | PG4 / HG Intermediate |


On Narrabeen Park Parade. When coming from the south, turn onto Ocean St off Pittwater rd. Follow along until you cross Narrabeen lagoon. Turn right at the second or northern roundabout onto Narrabeen Park Parade. Parking is on the side of the road.
Landowners
Public land
Contact
Sydney Paragliding & Hang Gliding Club , SPHGC Safety OfficersResponsible
Sydney Paragliding & Hang Gliding ClubDescription
A North East facing cliff, with a lower section on the north-western end that is less steep and covered in coastal scrub and a higher vertical cliff face towards the south eastern end. Pilots fly over the 'blow hole', a sea cavern that runs through part of the headland.
Takeoff
HG: Make your way down to the eastern end of the ramp before attempting to launch. Make sure your wings are flying first. Typically you will get a couple of strong steps in before leaving the ground.
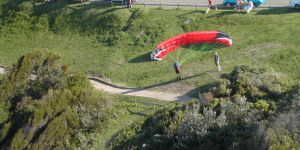
PG: A small grassy park on the western section of the cliff. After launching you should always turn left towards the beach, as it is only just possible to make the glide if the lift is too light to stay up. Gain height on the lower slope and once level with the sandstone lookout, cross onto the main face. When conditions are good, pilots often cross from here to Cooks Terrace.
Landing
HG: At the northern end of the beach near the end of the road.
PG: Warriewood beach. Check beach for tide and whether beach is crowded before launching. Top landing in the clear area to the left of launch, however take care in strong conditions as the bushes in front generate some turbulence. Top landing on the launch is possible but requires accurate flying. In either case do NOT fly over the road.
Flight
An enjoyable site, however this site catches out more pilots than any other site - be cautious. Water landing is dangerous. Lower Level Airspace at 2500'. Don't fly over the houses.
Hazards / Comments
HG: Power lines along the road between the surf club and toilet block on the beach. If you start to see "darkies" or wind gusts on the water behind Mona Vale Headland whilst in flight consider the need to land soon, this signifies that the breeze is veering to the north. Pilots making the return run from Cooks Terrace will come around the Northern end of the ridge quite low and cannot be seen from the take off.
PG: It's a long way to the beach if the wind is light. Don't cross onto the main face until your body is level with the sandstone lookout. Lower down on the face there is often a dead zone and you may find you are not climbing, it's truly a long way back to the beach from this situation. If the wind moves to the north, the landing on Warriewood beach becomes affected by rotor from the Cooks Terrace headland. Pilots making the return run from Cooks Terrace will come around the Northern end of the ridge quite low and cannot be seen from the take off.